56 Brand New Stampin’ Up! Ribbons

At my Catalog Kickoff event I had a display of all the brand new Stampin’ Up! Ribbons, Trims and Twine.  I actually bought a roll of every one.  And then I thought I should do a video to show them to everyone that couldn’t come to the kickoff or that doesn’t live local to me.  They are so much better in real life than they are in the photos in the catalog.  And while the video isn’t exactly real life – you can’t touch them – you can see them a little bit better than just looking at the little photo in the catalog.

ribbon

I took a couple of photos after arranging them in rainbow order – I had all the like styles together while I shared them in the video.

ribbon2

And here is the video.  If you are reading this in an email you may need to click through to my blog or YouTube to see the video.  And while you are there be sure to sign up for my YouTube channel so you know when I post a new one.

I hope you like seeing all the new ribbon.  Which one is your favorite?

If you are ready to shop visit my online store?  SHOP NOW 

Thanks for visiting today!

monika-signature-018

2015 New Catalog Product Shares

With a new catalog comes new ribbons, new Designer Papers, new basic papers and new Embellishments.  Flipping through the pages I always have a long list because I want to see it all and sample it all.  So for the past few years I have been offering product shares.  This allows you to get a sampling of the new products without having to purchase full packages of everything.  I buy them and divide everything amongst a group of people.  You can see, feel and play with your samples and then order more of the items you love!
This time I have 6 different choices for you:

  1. Ribbon Share $34 – includes all the new ribbon pg. 158-159 PL cards - 4x6-005
  2. Designer Paper Share $25.50 – includes samples of all the new Designer paper pg. 142 – 144 PL cards - 4x6-003
  3. Color Collections Paper Stack Share $19 – includes samples of all the monochromatic stacks pg. 144 PL cards - 4x6-002
  4. Paper Basics share $9 – includes new items in our basics and base materials pg. 148-149, 151 PL cards - 4x6-004
  5. Embellishments share $8 – includes new embellishments pg. 160-161 PL cards - 4x6-001
  6. Gotta Have it All $95 – includes the 5 shares mentioned above plus the new sequins PL cards - 4x6-006

Choose any combination that you would like.  The shares will be available to pick up at my house or I can mail them to you for the cost of postage.   Payments due June 14th for orders going in on the 15th.  If you have questions let me know.

Contact me to arrange payment – Email me

monika-signature-018

The New 2014-2015 Stampin’ Up! catalog is LIVE

The New 2014-2015 Stampin’ Up! catalog is LIVE

10151898_10152495490617189_7959032376709229676_nThe new catalog is live!  And it is a beauty of a catalog with lots of fun new products and full of samples and ideas.  This new catalog is very user friendly!  On my blog there is a link in the right had side bar to the pdf.  And if you want one in real life (its always better to have one in hand) then contact me.  I have copies here for my Stamp Club, card clubs and regular customers.  If you aren’t near me I’ll have to mail it to you so I need to confirm an address with you – so you’ll need to email me.

I wanted to mention a few new things this catalog has –

  • It’s organized by projects/events – birthday, memory keeping, kids, decor, etc.
  • sections feature the stamps with coordinating accessories
  • the first 2/3 of the catalog feature stamps (with coordinating accessories listed with a featured sample or technique) and the accessories section is in the back divided by category.
  • Kits and bundles are included again.  Bundles have coordinating products at a 15% discount!
  • the catalog has increased by 40 pages
  • throughout the catalog we have listed supplies with item numbers and prices for a few samples to make it easy to buy what you need to make that sample
  • samples are either “you can make it” or “everything you need”
  • some samples are marked as “quick & easy”
  • in the back is the stamp index with section icons
  • plus a brand new Greeting & Alphabet index!
  • and the accessory index is back
  • don’t miss the Ronald McDonald House Charity stamp set inside the back cover
  • Hostess sets are still at the back – and I love them!

Enjoy the new catalog!  I’m sure you will LOVE it!

I have Ribbon Shares for all the new ribbons.  I sent an email this morning to my customer email list.  If you are interested and did not receive the email please let me know and I can send it to you.

monika-signature-018

New Catalog Ribbon Shares

June 2013 Ribbon Shares

Ribbon shares are a great way to get some of all the new ribbons without having to purchase fulls rolls of each color.  Share the roll and share the cost.  See the details below.

3/8” Ruffle Stretch Ribbon – In-Colors

Flirty, stretchy, fun! One edge has ruffles, the other has stretchy elastic.

Baked Brown Sugar

Coastal Cabana

Crisp Cantaloupe

Pistachio Pudding

Strawberry Slush

Apprx. 2 yards of each color ribbon

Plus: In-Color Boutique Details – 1 in each color

Share price $13 to pick up at my house

______________________________________________________________________________________________

3/4” Chevron Ribbon

Trendy must-have! Adorable twill with chevron design. Whisper White accent woven through.

Basic Black

Blushing Bride

Calypso Coral

Cherry Cobbler

Chocolate Chip

Crushed Curry

Island Indigo

Marina Mist

Pear Pizzazz

Smoky Slate

Pumpkin Pie

Wisteria Wonder

Apprx. 2 yards of each color ribbon

Share price $25 to pick up at my house

_____________________________________________________________________________________________

New Ribbons for 2013-2014

Soft Sky Seam Binding                                        

Pear Pizzazz 3/8” Taffeta

Blushing Bride ¼” Stitched Grosgrain             

Bermuda Bay and Melon Mambo 1/8” Taffeta

Blue 3/8” Denim Jean Ribbon

 Approx. 2 yards of each color ribbon

Share price $9 to pick up at my house

Payments due to me by June 14th.  I’ll be placing the orders the next day.  If you need the share(s) mailed to you there will be a shipping charge also.
Contact me if you would like to participate.

monika-signature-018

Q&A – Ribbon Bows


Bow Tutorial


 Q&A

Q: What is your favorite ribbon bow technique?A: Well, I’d like to say it’s a natural ability, but that wouldn’t be true! I’ve learned how to make a bunch of great bows through resources from Stampin’ Up! and my fellow demonstrators. Here are 5 of my favorite bows as well as tips for making them.

Crafting Bow Techniques by CraftyPerson

1. Two Colored Double Bow: Layer two 18” ribbons. Layer ribbons then tie a standard bow. Before pulling the bow loops to tighten the bow, take a moment to twist the ribbon ends so they lay straight. Pull bow loops to tighten, then fan the inside bow loops out from behind the top loops.

Crafting Bow Techniques by CraftyPerson

2. Elegant Bow: Lay a 5” piece of ribbon out flat. Add a dab of SNAIL to center of ribbon. Fold in right end and adhere to center. Add a dab of SNAIL on top of ribbon end. Fold in left end and adhere to center. Add a dab of SNAIL on top of ribbon end. Place one end of 2” ribbon over center of ribbon, creating a “T” shape. Add a dab of SNAIL on top of 2” ribbon end over folded ribbon. Wrap 2” ribbon around folded ribbon until it overlaps and adheres to itself. Pull ribbon snug so it is flat, but not so tight it causes the folded ribbon to gather. Trim off excess ribbon. Press bow flat or push the ends gently to puff it up a bit. Add to card or layer on top of a ribbon strip.

Crafting Bow Techniques by CraftyPerson

3. Perfect Double Bow: Select a brad and spread prongs out flat. Begin with 18” ribbon. Use a ruler or estimate the lengths. Fold ribbon 3” from end with 3” section on top. Hold finger over folded layers 1” from fold with loop to left. Fold long end towards your finger to create 1” loop on right. Keep finger over center to hold layers in place. Fold long end back to center to make 1-1/2” loop on left. Fold ribbon back to center again creating 1-1/2” loop to right. Pinch ribbon at center and pick up layers. Set layered ribbon on brad with opened prongs. Fold prongs over ribbon and press flat. Trim ends.

Crafting Bow Techniques by CraftyPerson

4. Hole Bow: Punch a hole in card stock with 1/8” or 1/4” punch. Thread both ends of a 22” long ribbon up through hole from bottom. Slide ribbon loop around card stock and tighten by pulling ends. Keep ribbon ends the same length. Split ribbon ends so one comes out above ribbon and one comes out below. Make sure ribbon isn’t twisted. Tie a basic bow. Fluff and adjust bow as needed and then trim ribbon ends.

Crafting Bow Techniques by CraftyPerson

5. Fork Bow: Begin with a standard dinner fork with four tines and a 10” piece of ribbon. Place ribbon across front of fork with 1/3” of ribbon to left of the fork. This end will stay stationary. Wrap right end of the ribbon around behind the fork, around left edge, over the top of the first end. Thread end down through space between the center fork tines below where the first ribbon crosses. Pull ribbon up behind the fork and through the space between center fork tines. Knot the two ribbon ends firmly. Slide ribbon from fork and trim ends.

Crafting Bow Techniques by CraftyPerson

Go Bow Crazy

Have fun practicing and experimenting with these bows and different types of ribbon. Pretty soon your friends will be asking you how your bows always look so great!
We have a number of ribbons retiring this month. Make sure to order your favorites before they are gone!

© CraftyPerson Production. Images © Stampin’ Up!


Georgia Sales Tax Holiday, 99cent fabric and product shares

I’m going to combine several things in this post – I have two product shares, there is a special on some of the SU fabric, and in Georgia we have a sales tax holiday 8/10 & 8/11.  So read on….

Product Shares

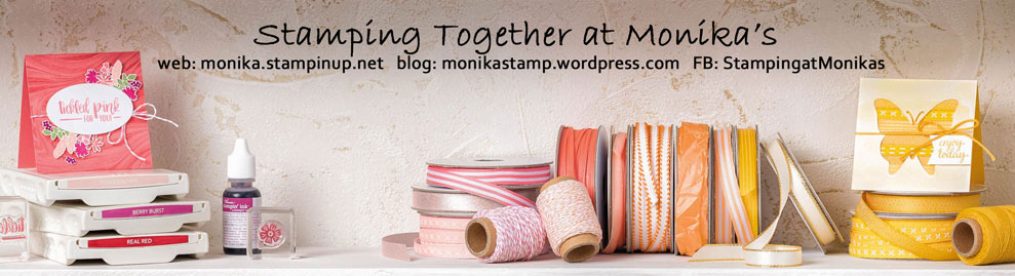
With the start of the new Stampin’ Up! Holiday catalog I am going to do two product shares – a ribbon share and a paper share – I’ll plan to place orders for these on Aug. 19th.  Once I received the orders I’ll divide the items, package them up and have them ready for pick up at my house or send them out in the mail to you.  The ribbon share will be groups of 5 and the paper share will be groups of 8.  It’s a great way to get a little bit of each and see what you like before buying more.  So here are the details:

 Holiday Ribbon Share

The share will include the following items from the 2012 Holiday Catalog:

3-1/2” Scalloped Tulle Ribbon – 2 yards of each color – Cherry Cobbler, Crumb Cake, Gumball Green

¼” Sweater Trim – 2 yards of each color – Cherry Cobbler, Gumball Green, Whisper White

7/8” Stampable Cotton Ribbon – 2 yards Natural

½” Striped Satin Black/Gray Ribbon – 2 yards

Designer Ribbon Slides – 3 pieces

Handmade Holiday Stitched Felt ornament – 1 piece

Share price $17 to pick up at my house

$19 to mail it to yours

Holiday Paper Share

The share will include the following items from the 2012 Holiday Catalog:

Candlelight Designer Series Paper – 6”x6” piece of 5 double sided designs and 1 flocked

Core’dinations Card Stock – three 6”x6” pieces of each color – Cherry Cobbler, Early Espresso, Gumball Green

Snow Festival Designer Series Paper – 6”x6” piece of 6 double sided designs

Snow Festival Designer Printed tags – 1 each of 5 designs

Champagne Glimmer Paper – 6”x6” piece

Festival of Prints Designer Series paper Stack – 4-1/2” x 6-1/2” piece of 12 double-sided designs

Howlstooth & Scaringbone Designer Series Paper – 6”x6” piece of 6 double sided designs

Orchard Harvest Designer Series paper – 6”x6” piece of 6 double sided designs

Sealed with Love Simply Sent Kit – 1 set (note card, envelope, twine, paper buttons)

Ghoulish Googlies Designer Kit – 1 set (glassine bag, tags, twine, googly eyes)

Noel Notes Simply Sent Kit – 1 set (die cut card and liner, envelope and liner, ribbon)

Share price $17 to pick up at my house

$19 to mail it to yours

If you would like to be a part of one or both of these shares please let me know and get me your payment by Aug. 19th.  Thanks!

99cent fabric

Stampin’ Up! Fabric – while supplies last you can get the following fabric packs for only 99¢.

Let me know if you would like to order any of these items.

Georgia Sales Tax Holiday

Some of our Stampin’ Up! items qualify for the holiday.  I will place an order on Saturday August 11 around 9:00 pm for any orders that I receive between now and then.  So email me (monikastamp@comcast.net) if you would like to order any of the items listed below.   Here are the details.

The state of Georgia is having a sales tax holiday for school supplies up to $20.00 per item from August 10-11. Because school supply items are included in this sales tax holiday, the list of items below will be state tax-free during the holiday period. Please note that you must place your order with Stampin’ Up!® during the tax holiday period in order to receive these items tax-free. Also, keep in mind that this is a state sales tax holiday and may not apply to additional city, jurisdiction, or county taxes.
The following items are tax-exempt during the Georgia sales tax holiday:

Number

Description

 Price

100425

2-Way Glue Pen

 $3.50

104332

Snail® Adhesive

 $6.95

104331

Snail Refill

 $4.50

104294

Sticky Strip

 $6.95

104430

Stampin’ Dimensionals®

 $3.95

103683

Mini Glue Dots

 $4.95

103579

Paper Snips

 $9.95

103179

Craft & Rubber Scissors

 $19.95

101879

Watercolor Pencils

 $19.95

105021

uni-ball Signo® Gel Pen

 $3.95

102845

Blender Pens

 $9.95

various

Stampin’ Write® Markers

 $3.50

119802

Subtles (10)

 $16.95

119803

Regals (10)

 $16.95

119804

Brights (10)

 $16.95

119805

Neutrals (10)

 $16.95

110755

Multipurpose Liquid Glue

 $3.95

104045

Anywhere Glue Sticks

 $3.95

123002

2011-2013 In Color Stampin’ Write Markers

 $14.95

128978

Silver Stampin’ Dazzle Marker

 $3.50

128979

Gold Stampin’ Dazzle Marker

 $3.50

Let me know what you need.  Have a great day!

New Ribbon Shelves in my Craft Room

Months ago I bought some shelves to hang on the wall for my ribbon.  Finally Greg hung them for me last night.  Yeah!  We did discover that the wall is warped so they aren’t perfectly aligned – but that’s ok – they work and are just perfect for what I needed them for – all my ribbon.  But before I show those to you I’m going to show you my craft room – messy and then clean.  This is the messy room – boxes, bags and baskets all over the floor, table is covered (and so are the chairs).


And what my table top looks like – no more room to do anything – and look at how many bottles of glue I had buried under everything.

So I cleaned the floor, the chairs and the table.  And then afterwards I emptied out all the boxes, baskets and bags that I had moved out into the hall.  Some was convention stuff and holiday catalog stuff.

Then I moved everything off the back counter so that Greg could hang my ribbon shelves.  I also cleaned out my ribbon and pulling out all the retired and sorted through all my big shot framelits and embossing folders which were stacked – I’m still trying to decide how to store those – I think I have a solution for now.  Here are my ribbon shelves (this is before I added all the holiday ribbon).

It’s a rainbow of ribbon.  I used to keep them sorted by type of ribbon but I’m going to try by color now – so I made a rainbow – ROY G BIV followed by browns, blacks and whites.   I also moved my scrap jars to use them as separators between all the groups of colors.  So far I like this much better than what I had before.  And I have my scraps right with my regular ribbon.


Now I have to clean my desk so I can move my computer over there.  And then tackle the storage closet again.  It is a never ending thing.  I still have shelves for Greg to hang over my windows – those will be for display – they will be high up so I’ll put my most favorite projects up there.  It may take a few more months for that to happen though.  And I am considering painting one wall with chalkboard paint so I can use that to write on and hang a line to display cards and hold ideas.  I never hung the boards that I bought – maybe because it just wasn’t ever exactly the right thing and now I may have figured it out.  At convention they had all the chalkboards and I think I really like that!

Have a great day!

Ribbon Shares

I did two ribbon shares in June and thought I would share how cute the packages turned out.  This is the In-Color Ribbon with a sample of the matching Dahlia’s.  I cut a piece of cardboard – from the back of the designer paper packs.  Stamped each end, wrapped the ribbon, added the dahlia’s and then put the whole thing in a clear envelope.

And here is the other one – the new 1/4″ stitched ribbon.  I punched card stock in the same color as the ribbon with the Round Tab punch.  I put all 10 colors in a tall cello bag.  I cut Basic Gray card stock with the Apothecary Framelit – folded it in half over the top of the bag and stapled it.  I punched a Daffodil Delight Blossom Punch, snipped the petals, added a piece of Designer Paper punched with the Boho Blossom Punch and put them together with a silver brad and added it to the top.

Thanks for stopping by today!

Occasions Mini Ribbon Share

There was lots of fun ribbon in the Occasions Mini catalog.  My favorites are the seam binding and baker’s twine.  Plus the Sale-A-Bration had some fun ribbon too.  For everyone that participated in my ribbon share for the Occasions Mini catalog I made them the cute little craft box and filled it with all their ribbon (and the SAB brads too).

I covered each of the four sides of the box with some of the Everyday Enchantment Designer Series paper and then wrapped some of the Calypso Coral ribbon around it.  I added a little jewelry tag too.

I hope everyone likes their ribbon share.  I’m hoping to have another ribbon share in April – I’ll make plans and send it out with my April newsletter.


On another note remember Monday all the things I rambled on about.  Well the fridge/freezer seems to be working just fine now – the repairman thinks someone left the freezer door open which caused the snowstorm inside and then I guess the freezer was trying to eliminate all the frost so it was getting warm – I don’t know but I cleaned out the inside, cleared out all the frost and now it seems to be working. Then my itchy spot that I thought was a mosiqito bite – well it wasn’t exactly that and by Wednesday I had spots on my arm and all over my stomach and they were spreading and red and itchy!  So i went yesterday to the dermatologist and now I have meds and cream – they said it was a delayed allergic reaction to a bug bite that I probably got last week during the one hour that I did some yard work ( I also got a blister that day) – so doctor’s orders – don’t do yard work in March – he really did say that but Greg doesn’t believe me.

Ok – moving on about my day – getting ready for scrapbook class tomorrow.

Utah Divas International Color Challenge – #32

Tuesday is here again – it just seems to come around so quickly – where does the week go?

This week’s Utah Diva’s Color Challenge was pretty easy for me – it just so happened that I was already working on something that pretty much used these same colors.    Daffodil Delight, Basic Black and Whisper White – all I had to do was add the Basic Gray.

Click on this link to go to the  Utah Diva’s Color Challenge blog.   There you can see the creations from the entire design team and add a link to your creation if you decide to play along.

So what was I working on with these colors – my March Ribbon share boxes.  I happen to have in my big stash of stuff a bunch of little take out boxes that were Daffodil Delight.  I bought these a couple of years ago at a store in the $1 bin.  And never did use them.  I was trying to think of a good way to present my ribbon share this month – I like to do something creative – it goes with the territory….. and I thought about these little boxes.  So that is what I used.

Inside each box is all the ribbon for the ribbon share.  Then when I saw the color challenge for this week I thought I just need to add the Basic Gray to this project and it will be perfect.  Here is my updated project for the Color Challenge today.

I stamped the flower from Fifth Avenue Floral on a piece of Watercolor paper and used my Aquapainter and the Daffodil Delight ink to watercolor the flower.  Then I cut it out. It is layered with a dimensional on top of a scallop circle punched out of Basic Black card stock.  Then underneath that is a larger scallop circle out of Basic Gray.  This one is actually the scallop end of the tag on the Two Tags die cut using the Big Shot.  What you do is cut the tag out, then put the tag back on the die in the opposite direction matching the cut scallop end up with the scallop on the die to cut the other side.  This cuts out the other half which then layers perfectly with our original Scallop Circle punch. Finally I added pearls to the center of the flower and then put it on the front of the box.

On the top of the box is an oval punch that says “for you”.  And I tied the top of the box with Taffeta Ribbon – in Basic Black, Daffodil Delight and Whisper White.

So you have two different versions of the take out boxes.  The one with the ribbon share uses the Four Frames stamp set for the label on the front.

Take a minute to visit the UDI site and play along with us this week.

Stampin’ Up! Supplies:

  • Card stock:  Watercolor paper, Basic Black, Basic Gray
  • Ink: Daffodil Delight, Jet Black Staz On
  • Stamp sets: Fifth Avenue Floral, Teeny Tiny Wishes
  • Accessories:  1-3/4″ Scallop Circle Punch, Oval punches – 1-3/4 x 7/8 and 1-3/8 x 5/8,  (Big Shot Die Cut Machine, Two Tags die, Aquapainter, Basic Pearls, Taffeta Ribbon – Daffodil Delight, Basic Black, Whisper White, Stampin’ Dimensionals.

To order Stampin’ Up! Supplies to make this project click here.