My Blog is Moving!

I know it’s been quiet over here lately.  Well I have news….my blog is moving!  I finally got my own domain name and I’m moving my blog over to the new site. Now you will be able to find me here – atmonikasplace.com

So I won’t be posting on this blog site any more.  If you are subscribed by email you should automatically start receiving the updates from the new blog once I start posting over there.  I’m still working on getting everything cleaned up and looking pretty on the new site so there will still be some “construction” going on.  But I wanted to let you know that I won’t be posting here anymore.

I hope you will come join me At Monika’s Place …..

mp-logo

Thanks so much!

mp-signature


The Color Revamp

Stampin’ Up! is going to be doing a Color Revamp this year.  It’s been 8 years since we made a significant change to our core colors.  Color trends are change over time and we want to keep our color offering fresh, new, and relevant.

What does that mean? Let’s take a look.

  • Colors will be updated in the 2018-2019 annual catalog.  This will start on June 1, 2018.
  • the In Color program will remain the same – with 5 colors rotating in each year and staying for 2 years
  • keeping 27 of our existing core colors
  • 13 core colors are going away
  • 5 In Colors (2016-2018) are going away

colors going away

  • 5 new In Colors are being introduced – the 2018-2020 In Colors 2018-2020 in colors
  • adding 10 brand new core colors  new core colors
  • adding 6 returning In Colors that will now be core colors returning colors
  • our color offering will expand from 50 to 53 colors
  • we rearranged the color families a bit

2018 colors

I’m excited about the changes and the new colors.  The majority of the retiring colors were not any that I was using.  I can’t wait to get my hands on the new ones!

I received these color swatches at the CenterStage event last weekend so here are all the colors in a pretty rainbow swirl!

20180415_170420859_iOS

Be sure to order any ink refills, card stock and accessories in the retiring colors before they are gone for good.  You can shop in my online store – HERE.

Thanks for stopping by today.

monika-signature-018


This week At Monika’s Place

card-makers-class2

Class Reminders for March

There are just a few more days to RSVP for Card Maker’s Class.

  • Wednesday, March 28 – Paper Pumpkin Craft Time – meet up to get crafty with our monthly paper pumpkin kit. Details here.

The Sale-a-Bration promotion is quickly coming to an end.  It’s your last chance to order and earn free items.  Qualifying orders earn Free Sale-a-Bration products and there are lots of things to choose from.  They’ve even added some regular catalog items as choices.

SHOP NOW

more sab2

See you soon!
monika-signature-018

Easter Bunny

Easter is approaching so quickly!  I really haven’t done any creating for it at all.  I normally have my extended family over and I make them handmade invitations but this year it snuck up on me and I didn’t get any made in time – so I had to do an evite – I’m so sad.

I did create this card for my Stamp Club this month.  I decided to use the Garden Girl stamp set with the cute little bunny.  And the Springtime Foils Designer Series Specialty Paper from Sale-A-Bration.  Sale-A-Bration is coming to and end – it will be here before we know it right there with Easter!

easter-bunny-foil

The Springtime Foils Specialty Paper is one of the Free Choices during Sale-A-Bration – you just need a $50 order and you can get the full pack.  I used the stripes for my card and this paper works so beautifully with our Stampin’ Blends.  I used the Pink Pirouette Stampin’ Blends to color in the stripes in between the silver printed stripes.  It’s subtle but pretty.  It would be fun to do bright colored stripes – and even cut the paper into egg shapes.

The bunny is stamped with Memento Black ink on Whisper White card stock – I did some coloring with my Smoky Slate Blends and cut him out.  The fence is stamped in Crumb Cake ink and colored in with the Crumb Cake Stampin’ Blends.  Then add the grass in Wild Wasabi and die cut with a Stitched Circle.  Behind it is a Wild Wasabi scalloped circle cut from the Layering Circles Frameltis dies.

I tied some Silver Bakers Twine around the foil layer before adhering it with Stampin’ Dimensionals to the front of my card.  The small Happy Easter is from the Teeny Tiny Wishes stamp set.

I “hop” you enjoyed this card.  Thanks for stopping by.

monika-signature-018

Lots of Lavender Gift Box

There are less than three weeks left of Sale-a-Bration.  Did you already get your favorite items for Free?  One of the Level 1 choice is the beautiful Lots of Lavender stamp set.  It reminds me of the Lavender farm that we visited last summer.  We were on San Juan Island in Washington, State.

20170815_232017699_iOS

For today’s project though I decided to use Berry Burst for the flowers and I think they came out pretty too.

Lavendar-box

I created a box out of Berry Burst card stock added the Berry Burst Metallic Edged Ribbon and finished with a tag.  Inside the box I used the Sweet Soiree Ready Shreddie – Crinkle-cut shredded paper that perfectly matches my box.

lavendar-box-tag

The outline image is stamped in Black, the flowers in Berry Burst, the leaves in Old Olive and the ribbon in Soft Sky.   I added Wink of Stella over the flowers but you can’t really see it in the photo.

I also used the Celebrate You Thinlits Dies to cut the Celebrate out of Silver Foil.  The dies are a Level 2 Sale-A-Bration choice.  It’s tied on with some Soft Sky Baker’s Twine.

Sale-A-Bration ends on March 31st so make sure you do your shopping before then!

SHOP HERE

Thanks for stopping by today.

monika-signature-018

Birthday Wit

Have you noticed the Birthday Wit stamp set in the Occasions catalog?  It’s on page 9.  Since its basically all words it doesn’t stand out very well.  It is a fun set to have to make some birthday cards.

birthday-wit-card

For this card I used the Painted with Love Specialty Designer Series Paper.  It has gold foil accents.  And painted brushstroke patterns.  Some of the patterns are a bit bright for me so on this card I used the large sentiment from the Birthday Wit stamp set.  I actually stamped it multiple times in a variety of colors – Calypso Coral, Melon Mambo, Powder Pink and Rich Razzleberry.  The main panel on the card was stamped with Soft Suede ink.  and then I cut out all the block words and covered them with the colored words.  This is another one of those short front cards where you can see the designer paper on both side.  I used the White cotton ribbon on this one.  And finished with some Gold Metallic dots.

I think it turned out to be a fun card!

There are only 3 more weeks of Sale-A-Bration left – if you haven’t placed an order to get your free product choices be sure to do it soon.  There are some great options and once they are gone – they are gone.  Now there are two things that will carry over into our new catalog – the Celebrate You Thinlits and the Basket Weave Embossing Folder.  But they won’t be free you’ll have to pay for them then and the coordinating stamp sets won’t be available after March 31st.

SHOP NOW and Sale-A-Brate!

Thanks for stopping by.

monika-signature-018


Wild Flower Wishes Blog Hop

Wild Flower Wishes Blog Hop

The February Paper Pumpkin Thing Blog Hop is here – on March 1st!  The month of February was so short we had to push things out just a bit to make sure everyone received their kits and had time to create.  We will be sharing alternate ideas for the February 2018 kit – Wild Flower Wishes.  This kit contains supplies for 9 cards and envelopes, plus the stamp set and ink.

PP Blog Hop Header

28235487_2004386416485897_6706307280351568557_o

I actually have two sets of cards to show you today that I made mostly out of extra bits from the kit.  One set uses Whisper White Note Cards & Envelopes.  I always find those easy to pair with my Paper Pumpkin kits for making additional cards and alternate ideas.

pp-alt-notecards

I used the left over letter stickers and some of the flower stickers.  If you have the linen thread left you could use that or pull some from your stash.  I actually found some that I had left from an older Paper Pumpkin kit.  So really the only thing I added for these was the note cards & envelopes.  Here is a closer look at each one. You can click on each image to see it close up.


I also wanted to make a full size set of cards – well I really made these first and then I made the note cards.

pp-alt-cards

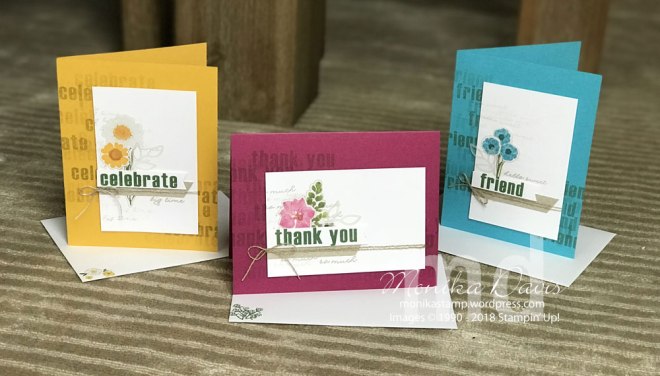
For these I added card stock in the colors to match the flowers – Crushed Curry, Berry Burst and Tempting Turquoise.  I also used the bold word stamps out of the stamp set – those weren’t used in the actual cards from the kit.  I’m so glad the stamp sets include extra images to make the set useful once the kit is finished.

For each card I stamped the bold words repeatedly in the background on the card base – I used Sahara Sand ink.  And stamped multiple times before re-inking my image.  The Whisper White layer is 4-1/4″ x 2-3/4″ – so one piece of card stock would give you 8 cards.  I used the corresponding script text and stamped that repeatedly on the white piece.  I added some of the flower stickers and greenery on each one.  The bold words were stamped on a 1/2″ strip of Whisper White.  And underneath is a strip of one of the card layers from the kit.  Some more Linen Thread is wrapped around the layer.  I also stamped the script text on each card in the Sahara Sand ink full strength to finish up the greeting.  The envelopes this time were stamped with the flower images.   Here is a close up of the three cards – the yellow is my favorite.


I hope you liked these alternate ideas.  I was quite happy with them and still had supplies to make the regular cards in the kit since I mostly used the stickers and stamps for these.

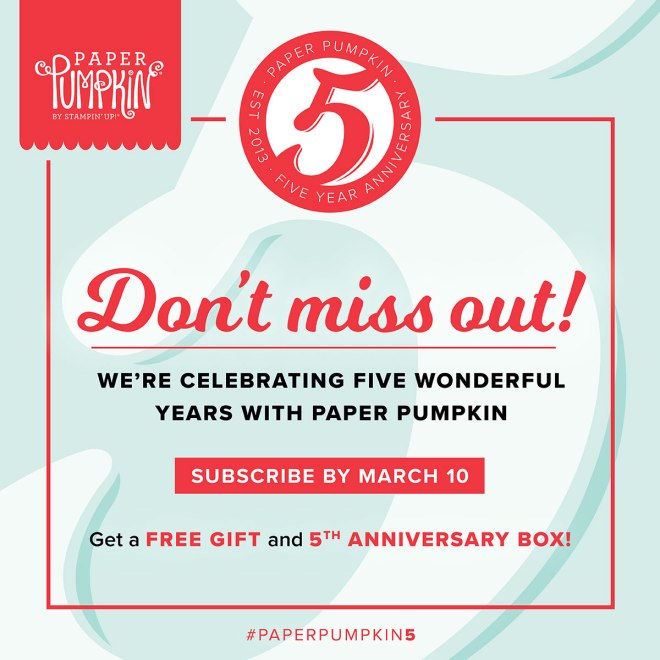
The Paper Pumpkin kits are a fun little escape and everyone comes up with so many creative ways to stretch them.  Its a perfect crafty gift any time of year – the kits come with everything and new subscribers will get the clear block in their first box.  You can Sign Up yourself Here.  Sign up by March 10th to receive the special March 5th anniversary kit.  Yes Paper Pumpkin is 5 years old and the March kit is going to include a gift for everyone!

And now it’s time to move on and see the rest of the gang’s creativity!  Next up is Rachel Tessman – she has the most creative ideas for these Paper Pumpkin kits each month.  Just click on her name or the next button to visit her blog.

pp next

Here is the rest of the Blog Hop List in case you get lost along the hop or just want to jump around.

Thanks for visiting.

monika-signature-018

PP_SAB__SHARE_THUMB_0118  02.11.2018_IMAGE-SHAREABLE-CANCELLED_PP5YR_USCA

Masculine Birthday cards

Do you struggle with creating masculine cards?  I think many of us do.  But there are some new products in the Stampin’ Up! Occasions catalog that make it easier to create them.  I have two versions of this quick card for you.  Both use the True Gentleman Designer Series Paper.  You could use any of the prints in the paper pack for these cards.  I’ve made a stack for a swap and I’ve been using them in classes.  And they use a stamp set that you might have missed!  In the very front of the Occasions catalog on the page by the table of contents is the Birthday Wishes for You stamp set.  The sample in the catalog is very feminine because of the color but there is nothing feminine about the set at all.

birthday-wishes-swap

The card base is Chocolate Chip.  Then add the Designer paper and then the stamped Very Vanilla strip.  To give it just a little more color I used my Crumb Cake Stampin’ Blends marker to color in the birthday.  Did you know that you can stamp with the classic ink – I used Chocolate Chip here – and it works great with the blends.

Here is another version of this card.

birthday-wishes

For this one I added the banner – stamped on another piece of Very Vanilla card stock and cut out.  Then pop it on the front with some mini dimensionals.  These are quick cards.

Enjoy!

monika-signature-018

Picture Perfect Birthday

Yesterday I shared a fun card idea that featured both sides of a piece of designer series paper.  Well like I said I had made several different ones and today I’m sharing another one with you.  This one featured products from the Picture Perfect Birthday Suite.

picture-perfect-birthday

The Picture Perfect Party 6×6 Designer Series Paper is such a fun little stack of paper.  One side of each piece is a photo and the other side is a graphic pattern.  It was fun to use this card idea with these papers.  And with all the different designs there were lots of options for what could be on the front of your card.  I used candles for this one, but there are balloons, party hats, donuts, party blowers and more.

Here is a supply list and measurements:

  • Bermuda Bay card stock – 5-1/2″ x 5-3/4″, scored at 4-1/4″
  • Picture Perfect Party Designer Series Paper – 5-1/2″ x 3″
  • Whisper White card stock – 5-1/4″ x 4″ (for the inside)
  • Whisper White card stock – 1/2″ strip
  • 3/8″ Metallic-Edge Ribbon Silver
  • Classic Ink – Bermuda Bay, Lemon Lime Twist, Berry Burst, Peekaboo Peach
  • Tear & Tape
  • Tutti-frutti Adhesive-Backed Sequins

This time I have photos of the inside of the card too. When you open it you get to see the back of the paper so the inside is fun too!

I hope you like this fun idea as much as I do.  Thanks for stopping by today.

monika-signature-018

Mail a Card Monday

Mail a Card Monday

I decided for 2018 to challenge myself to mail at least one card every Monday.  And to post it on social media with the hashtag #mailacardmonday – I figured if I told the world I was doing it and everyone was looking for me to do it I was way more likely to actually do it.  We are now 8 Monday’s into the year and I have been sending out at least 7-8 cards every Monday!  It’s working.  So how many days does it take to form a habit – is it 21 or 66 so something else? I don’t know for sure but right now for me I seem to be doing good and plan to keep it up.  Who is joining me?

Have you seen my mailbox?  I’ve been posting my mailbox with either my cards in it or me putting them in.  It’s funny how many people like my mailbox.

mail-a-card-monday

We don’t actually get a choice for out mailbox in my neighborhood.  Everyone has the same one.  They do look pretty good but it doesn’t take much to break one.  A neighbor ran right over mine a couple of years ago.  And every neighbor dog makes a pit stop there.

Anyway I thought I would share with you one of the cards going out in my mail today.  This week’s mail is really going out on Tuesday because it was a holiday on Monday.  We’ve had a lot of Monday Holidays already this year.

thanks-with-love

I have some thank you cards going out for some online orders that I’ve received in February.  I’ll have more going out next week too.  This is a fun card idea that I got from another demonstrator (my friend Renee Kohnke) when I went to Michigan at the beginning of the month.  This way you can show both sides of the Designer Series paper.  I modified it a little bit so I could use a 3″ wide piece of paper on my cards. You are basically cutting away 2-3/4″ from the front of the card and then attaching the designer paper to the short flap in it’s place.  I just realized I should have taken a photo of the inside of the card so you could see it.

Here are the supplies and measurements for you:

  • Very Vanilla Thick card stock – 5-1/2″ x 5-3/4″, scored at 4-1/4″
  • Painted with Love Specialty Designer Series Paper – 5-1/2″ x 3″
  • Vellum card stock – 5″ x 3-3/4″
  • Color Me Happy Stamp set
  • VersaMark Ink
  • Gold Embossing Powder
  • Heat Tool
  • Tear & Tape
  • 3/8″ Metallic-edge Ribbon Gold
  • Glue Dots
  • Very Vanilla Envelope
  • Pink Pirouette Light Blender Pen ( for coloring the flower on the envelope)


To make the card add Tear & Tape to the inside edge of the short front on the card base.  Lay your card down as though you were going to close it and align the Designer Paper with the back of the card, then fold over that front flap so the paper attaches to it.  For any adhesive that is hanging over on the inside – place your ribbon right on top of it – then tie in a knot on the front.  Next I slid the vellum piece in place (emboss your words on it first) and then used glue dots to attach it so the glue dots are hidden under the ribbon.

When you open the card you see the other side of the Designer paper on the inside.  I have made 3 or 4 different cards with this fun idea already.

Thanks for stopping by!  Leave me a comment and let me know what you think.

monika-signature-018